How-To Read A Tatting Diagram
Vintage tatting patterns relied on written text for directions on how-to make tatting designs, some had a photo of the finished project to go along with it, but not all. Many modern patterns now provide a diagram of the tatting design as supplemental instructive aid. There are also numerous tatting patterns out there, especially free online patterns, that rely solely on a diagram with no written directions. And I am amazed by the fantastic international designs coming out of Russia, Korea, Japan, just to name a few countries. Designs, that if you are like me and only know English, you are able to still follow and make once you are able to interpret the diagrams that they include in their patterns. The diagram is becoming the universal language of tatters. It is also a good learning tool for visual learners, and a great way to start thinking of tatting more visually. Which can also help simplify the process of learning to design your own patterns. All this to say, at least a basic understanding of how a tatting diagram works is immensely helpful and can expand the possibilities of your tatting.
The Basics:
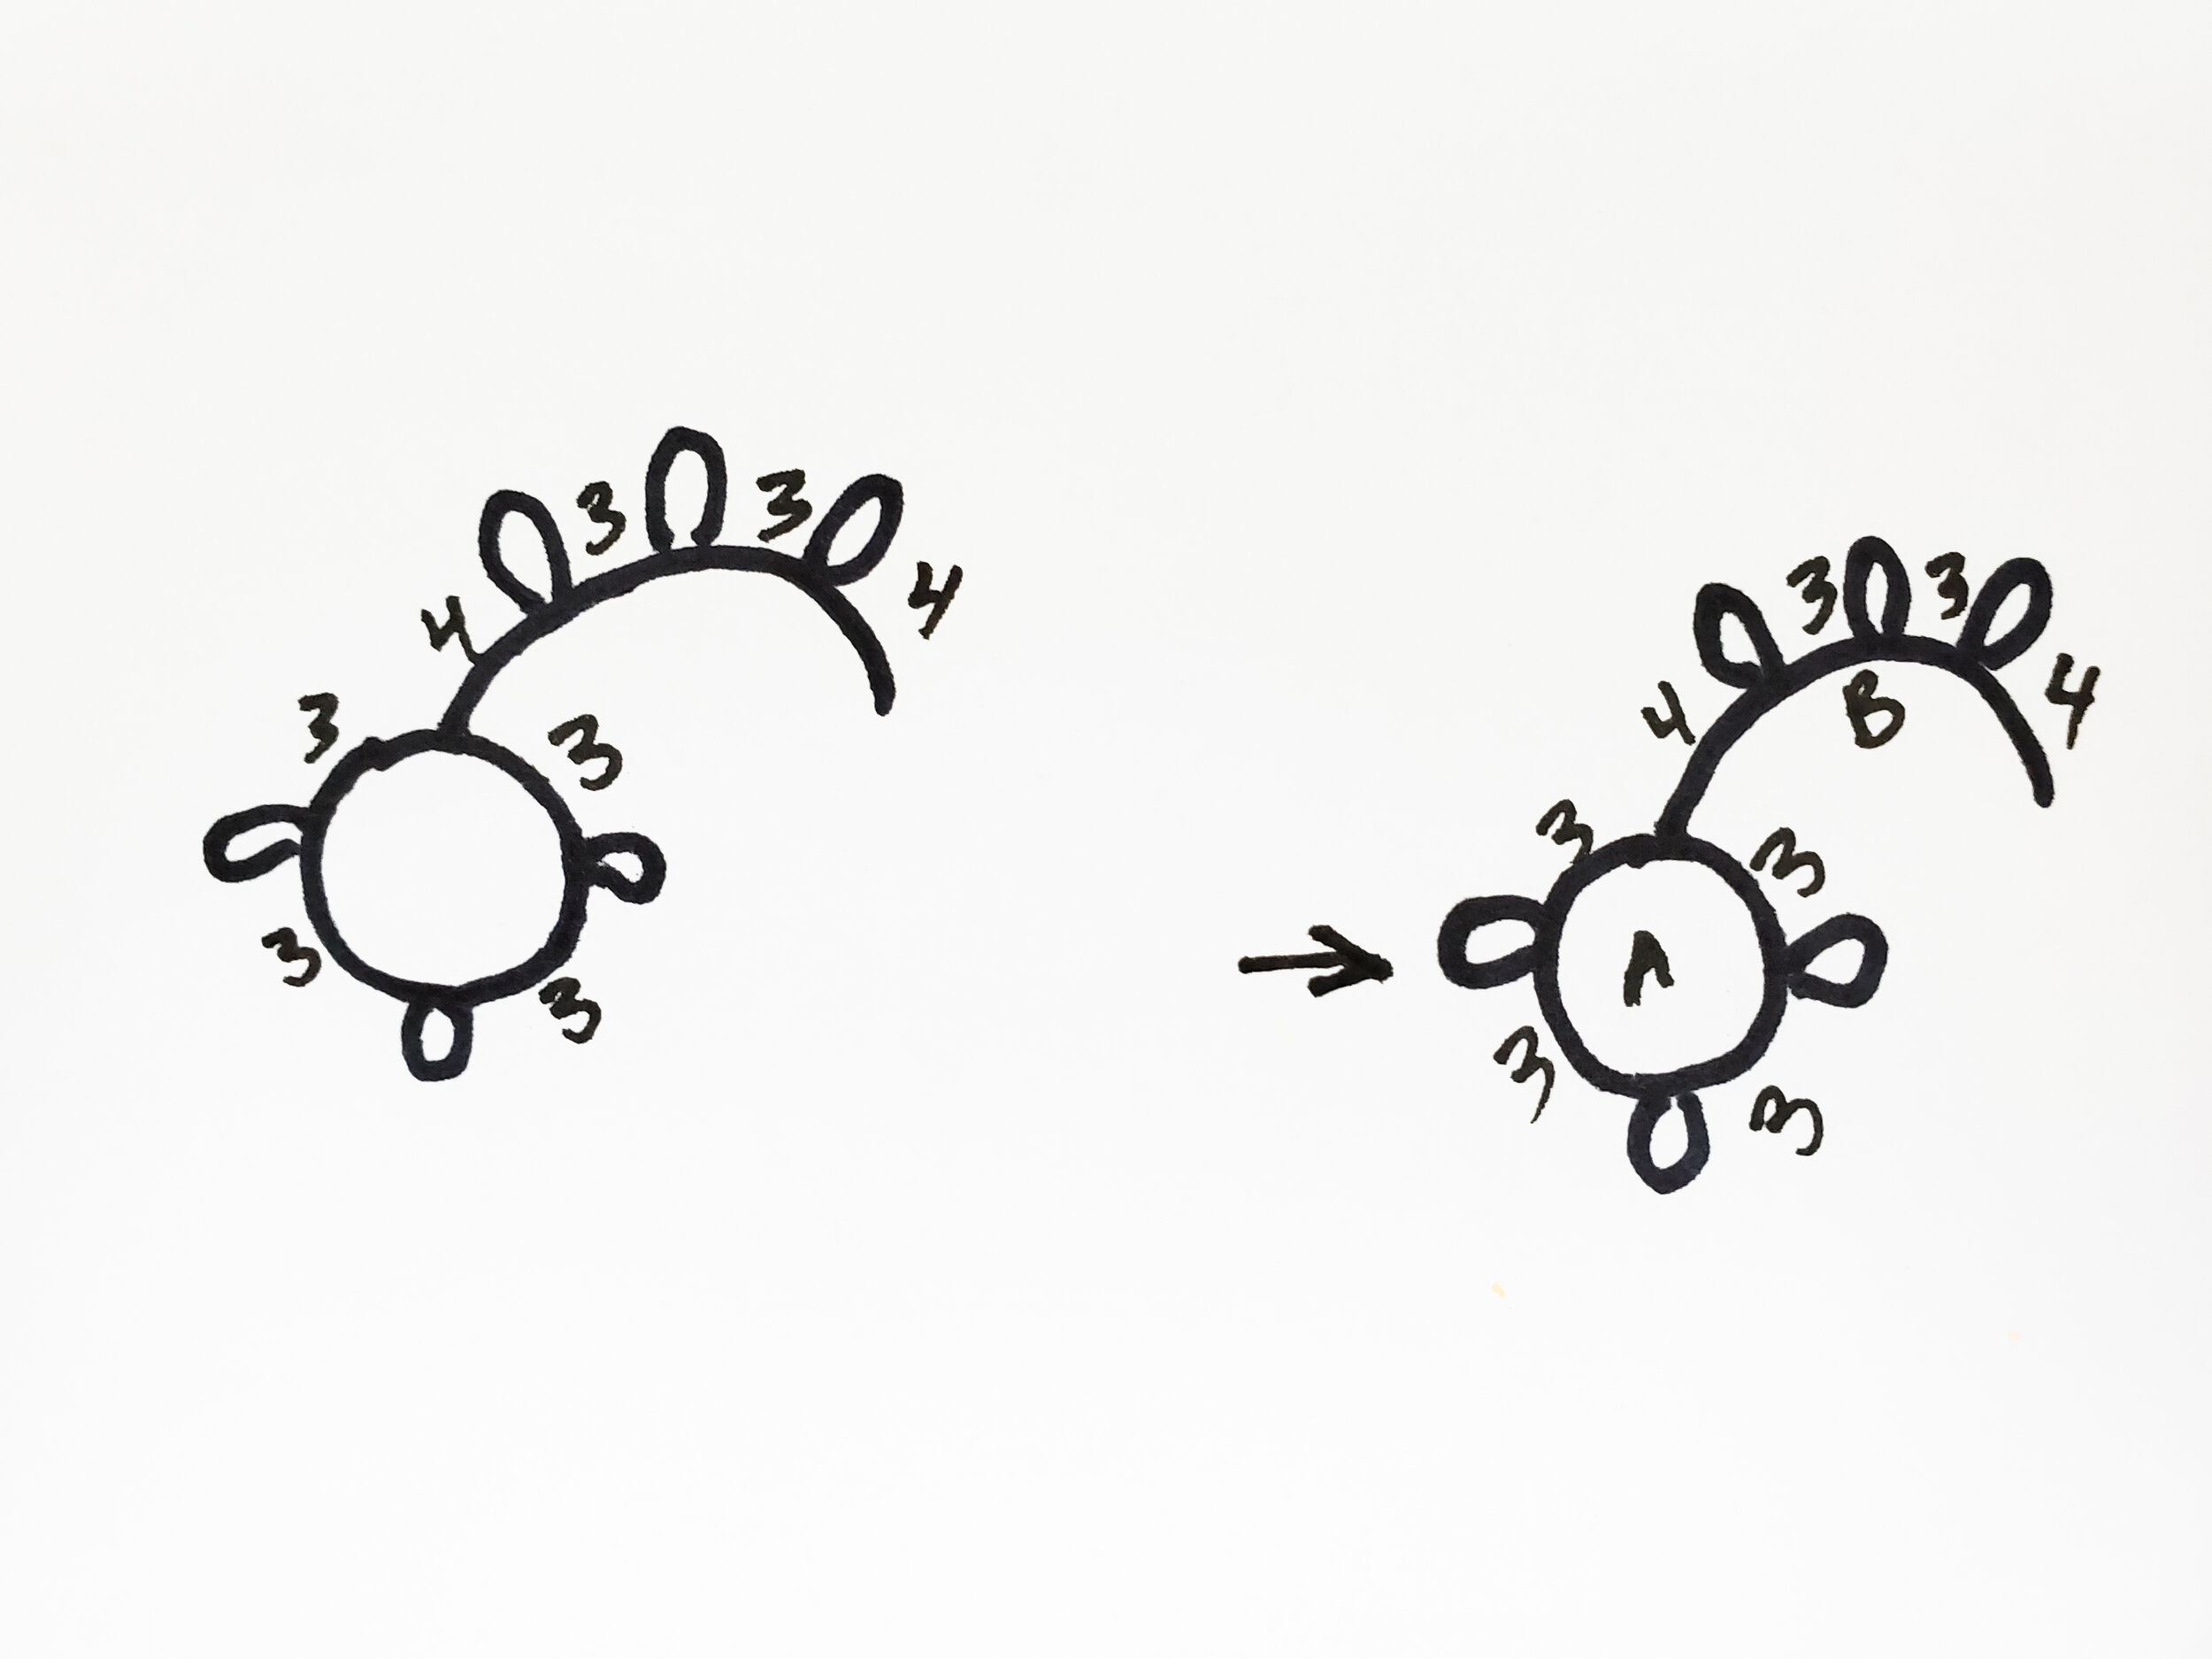
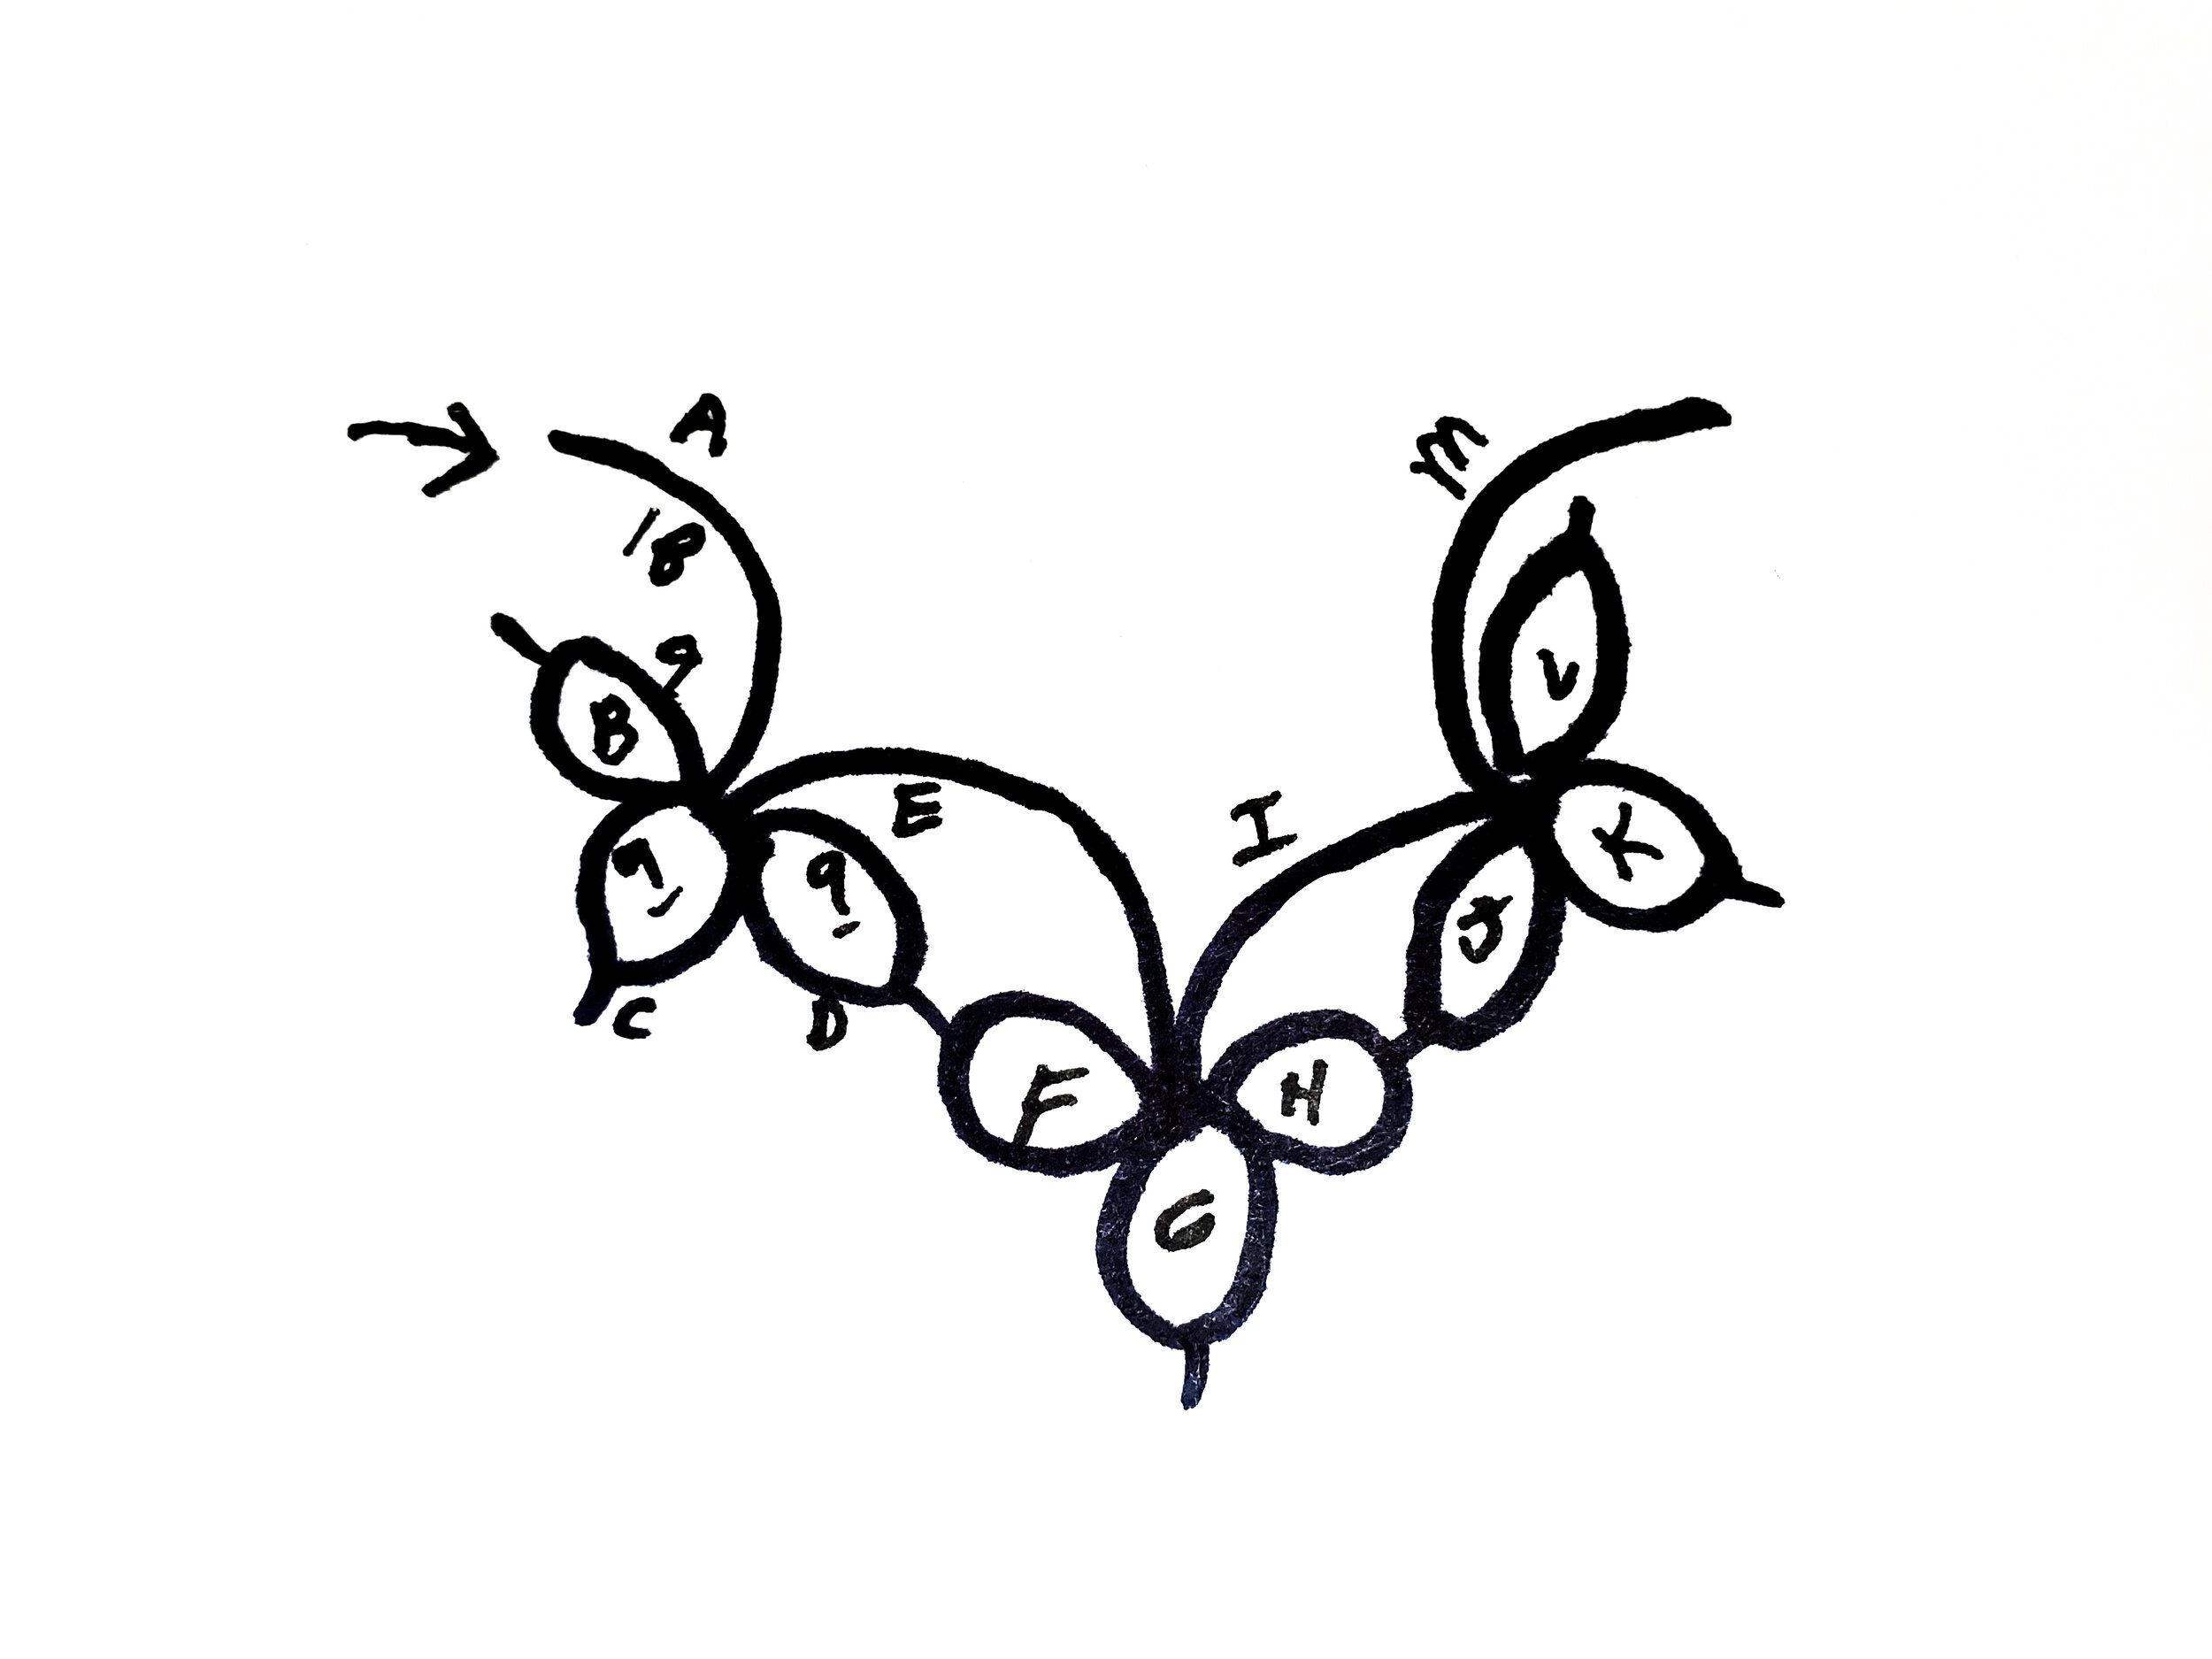
Circles indicate that you are to make a ring
Arches indicate that you are to make a chain
Loops or dashes mean to make one picot, and a dash that connects two rings indicates a picot join.
The number of double stitches to make are indicated by the numerical value placed between picots in rings and chains
Reversing work is not indicated and must be assumed by the direction of the preceding ring or chain. The basics of when to reverse work applies ( you can see my video on “Reversing Work” for help with this)
Most projects start with a ring and not a chain
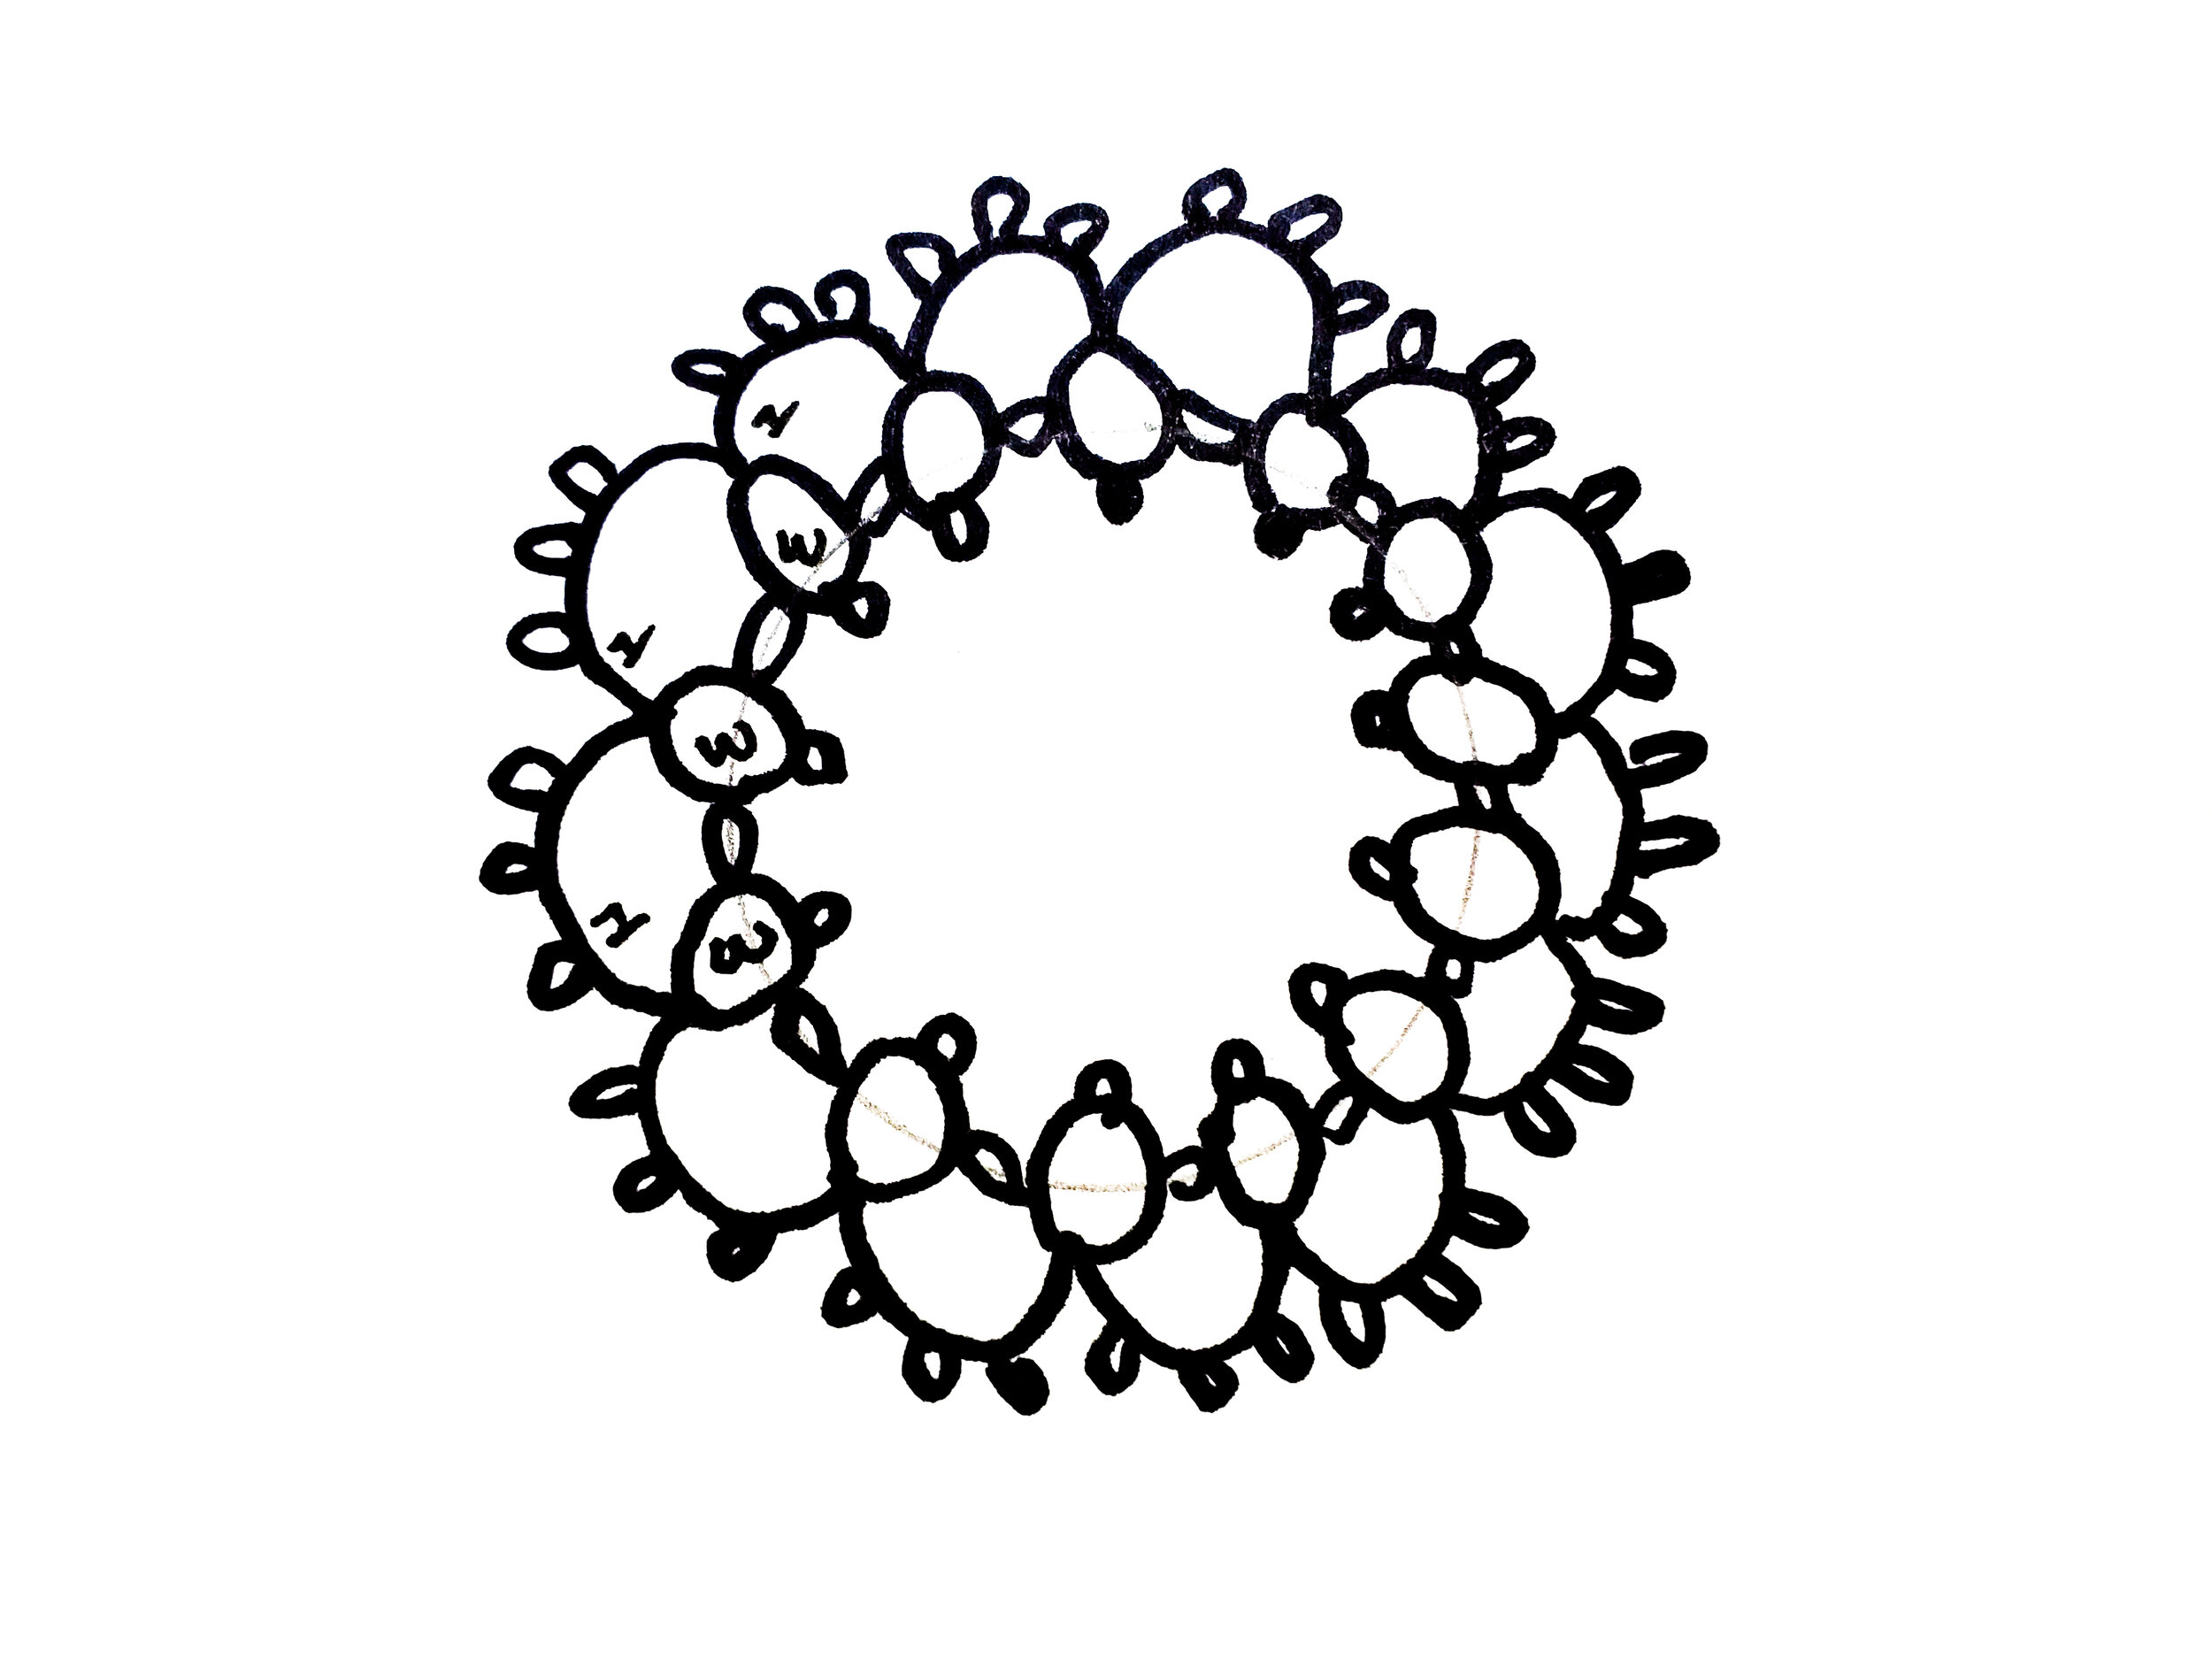
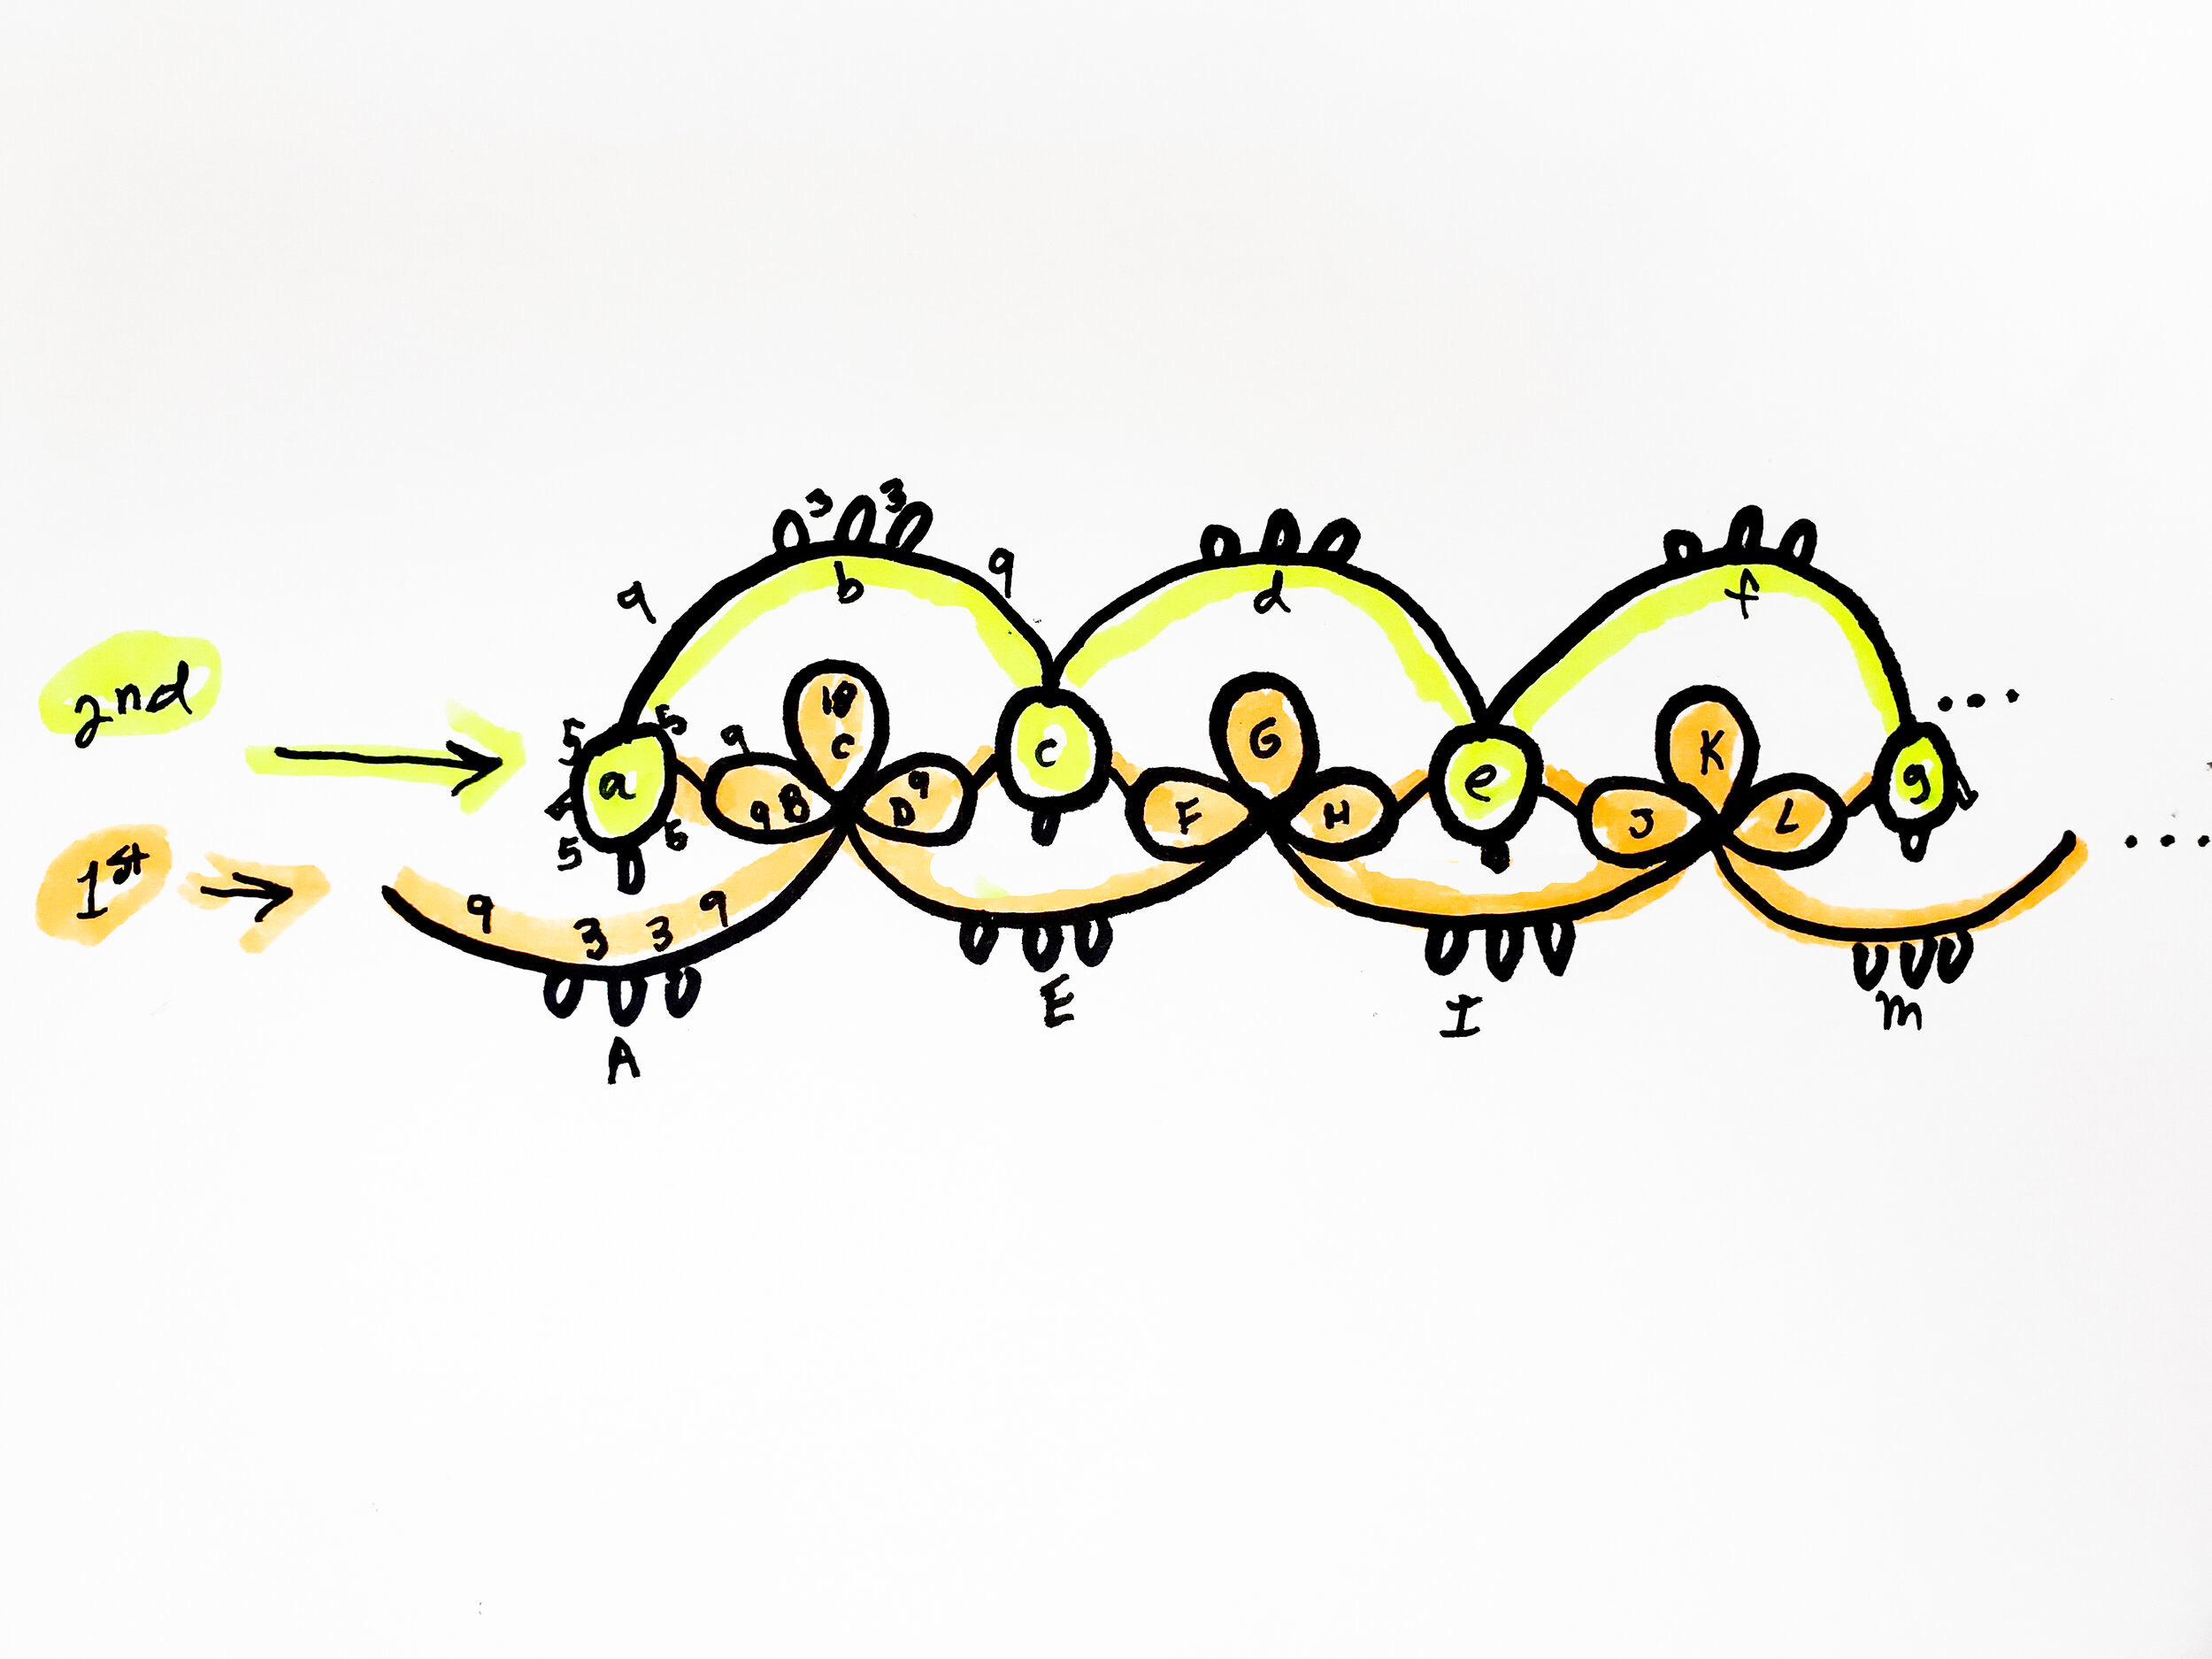
Most projects start in the center-most layer and work their way outward
VIDEO TUTORIAL:
Below are several roughly sketched examples of simple diagrams.
*Once you have the basic idea down, I recommend Googling “free tatting diagrams” or searching them on Pinterest. Pick a basic design that appeals to you, and give it a try.


